In my previous article, I talked about dynamic lighting in Unity. It requires installing URP on your Unity project. I overlooked the explanation of URP’s installation because it would have made for a very long article (which it already is 😕). But I felt it could still be useful to people, so tag along if you want to use URP in your project.
This guide was done on Unity 2022. We will focus on the installation of the 2D components but the same process can be used to get access to 3D components.
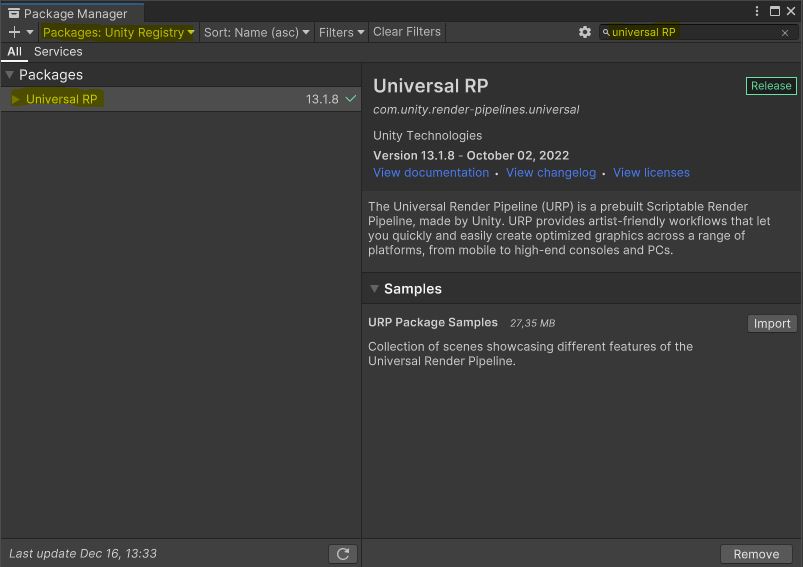
URP is a built-in package. As such, open your package manager by clicking on Window > Package Manager. Select Unity registry in the top-left corner of the window that just opened and search for “Universal RP” in the search bar. Click on the “install” button.
Now, it is time to use it in our project. Create a new folder from the “project” tab and click Create > Rendering > URP Asset. We will choose “with 2D Renderer” but you can select the other one if you do not plan on using it for 2D lighting. As the precision implies, this should also generate you a Renderer. If it did not or if you lost this second component, you can recreate one in the same menu.
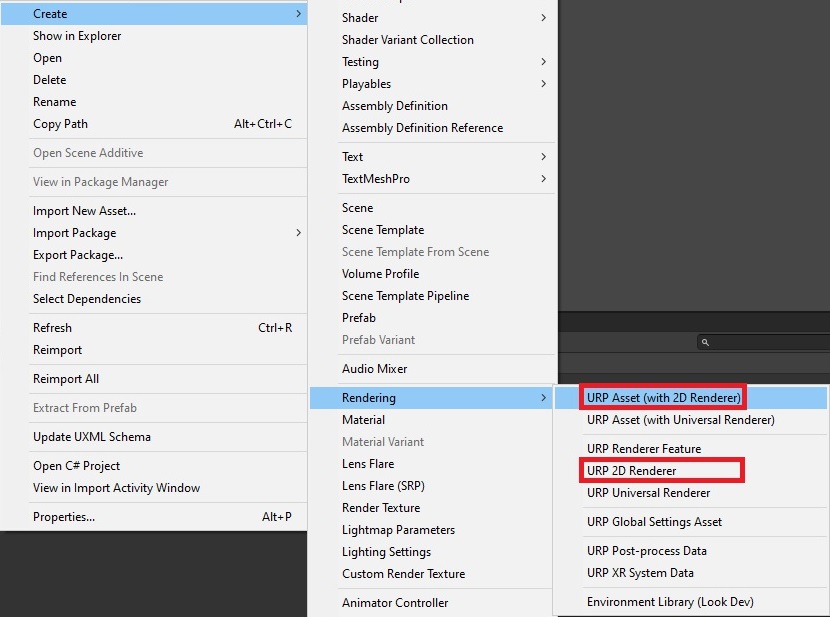
💡 If you create a new renderer, it will have to be set in the URP Asset. Otherwise, the default renderer should be set by default.
The URP asset must then be set in your project settings: go to Edit > Project settings. In the “graphics“ tab, put your URP asset in the “Scriptable render pipeline settings” field.

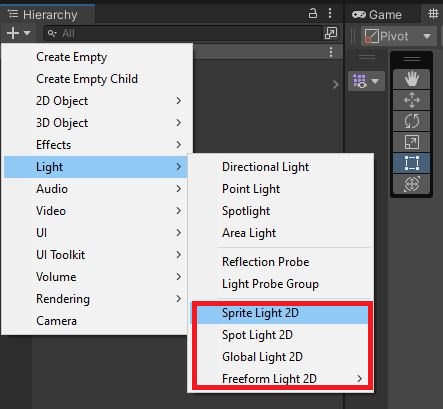
If everything went well until here, you should now see new elements in Create > Light.
Finally, all that remains is to convert your assets to be compatible with URP. To do this simply go to Windows > Rendering > Render pipeline converter
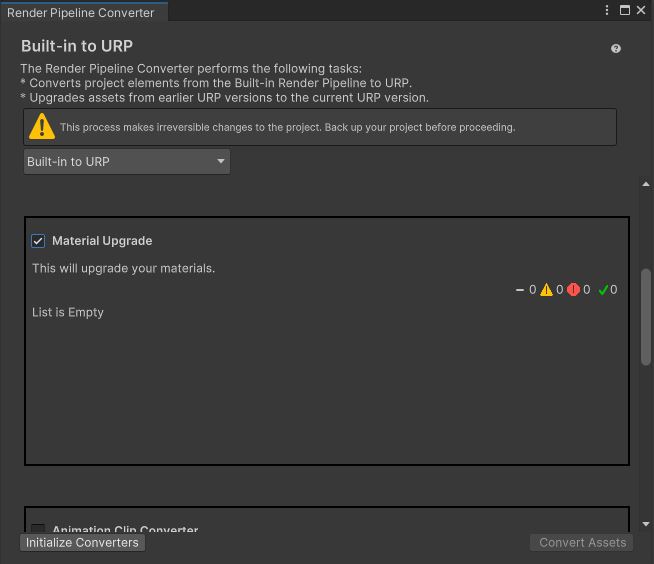
From here select "Built-in to URP" in the dropdown menu. Enable "Material upgrade" and click on "Initialize convertes" and then on "Convert assets".
You should now be ready to use the Universal Render Pipeline in your Unity project. Congrats!
Thank you for reading to the end! I hope to see you in the next post. 🦦